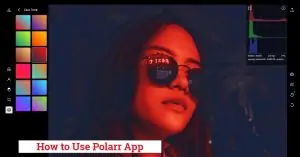
Users who are seeking straightforward solutions to alter their photographs will find online photo editors to be really useful. There is a wide selection of online photo editors accessible on the market; nevertheless, the usefulness of these editors is contingent on the characteristics and functions that they provide. Polarr Picture Editor is a prominent example of a high-quality online photo editor that is well-known for having capabilities that are exclusive to itself.
This post is going to take up the debate about Polarr and figure out what makes it different from other similar products. Read this post to learn more about the online photo editor that we’re going to talk about. Let’s get started.
In my last two previous articles, I wrote on Picsart mod apk and how to use meitu. These two applications are my favorite because of their amazing features and now I discovered a polarr and I use it as a for my instagram editing app.
The use of polarr application is similar to picsart and alight motion, it also provides some more advanced editing tools as compared to other editing applications like dehaze and split toning.
If you are looking for some downside of the Polarr app so to be honest I have not found a single disadvantage of this application but no worries if found then I will update here to inform you.
Polarr is well organized, easy to use and a completely free application. In this article we will also cover how to edit pictures using polarr and other popular features. So that you can make your photo’s look cool. Moreover all the images used in this content are taken by my DSLR camera and DJI Mini 3 Pro drone and then I transfer all images from polarr editing app and represent here.
Best Ways for Editing Images with Polarr App
Fix the Brightness
Normally I start my editing by fixing the brightness. Basically the brightness is darkness and lightness of the picture and it can be changed according to your picture that lies under the light section of polarr app. Following picture I took from my dslr camera in the early morning opposite to the sun. While taking the picture, the drone was facing the sun. That’s why the image looks very bright and washed out.

To lower that brightness, I simply go to the light section and lower the brightness until the photo gains some color and depth. I always used the same way to adjust the exposure whenever I needed it. It is difficult to capture the perfect light in the camera but polarr application helps to change the brightness and exposure according to the requirements.

Use Free Filters
The most famous and my favorite part of polarr is the various filters that it comes with. I really like making memories while traveling but the problem is that i don’t have enough time to edit my photos so at that stage, filters of polarr help me to make my images awesome in limited time. I have used many applocation’s filters but polarr’s filters are my favorite. They have perfect color tones, ultra fine and many other choices that we can use while editing.

Above all filters are available under the filter lab and its developer organizes it in a well manner so you can easily find out your required filter and apply it on your photo. There are some advanced features also available in the premium section on a monthly subscription basis. The Polar app comes with 124 free filters so if you don’t find one you like, it’s probably best to skip the filters and edit your photo with your own skill.

Now I’m going to show you the magic of colors by applying an Overness filter that will add quality, lighten the sand, lighten the jeans and add some sand to my skin which is great.

Here I apply the M2 filter of polarr and increase the exposure to make my picture a little bit brighter. Now you can see with very little work my image has been professionally edited. Can you guess that I took this picture from a $450 camera and edited it from my phone.
Add Contrast
It is a very beautiful picture. I really like the structure of rock that looks cool under the water but it was a little bit flat and I wanted to increase the rock structure by increasing contrast. The purpose of contrast is to add pop in between the light and dark area just like that rock. Contrast and other tools help you to bring the change in light and darkness in polarr app that is present in light section.

To make my picture a little bit dark, I increase the contrast by moving the slider to the right side but this makes my picture more dark so to fix that issue I add some brightness to make it slightly brighter. After increasing its brightness I see one more issue, the light areas become too light so here I use white tool to decrease the super light white areas. And finally you can see a very editing picture having fine contrast and a lightning look.

Add More Color
Have you ever seen the amazing view of sunrise or sunset and tried to capture such an amazing scene with your camera ? yes. I have also done the same experiment too. Lol.

With the help of the color section, you can add such beautiful tones in your picture. In this section, you can do anything related to color with your picture like change the tint tones ( purple and green ) or temperature tones ( yellow and blue ).

I took this picture in London, United Kingdom and I wanted to add some purple tone in order to pretend it was a beautiful morning. To do that I move the tint tool to the right and add some purple color in the picture. To add more color pop and prominent other tones in images I increase the vibrance and saturation. But after doing all these things I feel that the picture looks a little bit unnatural so then i add some orange color by moving the temperature icon to right to bring a warm look in the morning. Besides, I also needed to reduce the cool blue tones. At the end I got a reality based picture similar to the perfect sunrise tone.
Crop and Straighten
There are always some unnecessary things and empty spaces present in pictures that distract the photographer or editors. Unless you have a tripod setup with a grid to align the horizon, there are chances that the horizon and alignment in your image will not be exactly right. The crop tool in polarr app can help to adjust the horizon, crop the photo and remove all unnecessary and empty spaces.

In my beach photo, you can see that there is a slight crooked view to the left as well as a lot of extra space. To solve this problem, first I open the crop tool and straighten the image by rotating it. I wanted to make the perfect photo smaller for Instagram so I cropped it to a 4:5 ratio. I attached and zoomed in to center the image and selected Full to apply the changes.

Add Split Toning
This is another amazing feature of polarr app, it allows you to add various colors in the dark and light areas of the image. In this photo, I wanted to add an orange tan color to my skin tone which is in the gloom of the photo and the aqua tones in the sky that are in the highlights of the photo.

To make that change, I went to the split toning tool and selected the orange tone for more gloom. It added a warm, beachy and orange look in the darker areas. You can see palm trees and my skin tone. After that i selected the aqua color to add it into the sky which was the lighter color of the photo. Furthermore, I also enhance the brightness to lighten up the sky surrounding the palm tree and add some contrast for prominent pop. lastly I used crop tool to remove the unnecessary things under tree.

Dehaze
As you can guess the functionality of Dehaze “remove haze from images” is all in one functionality tool. It automatically eliminates haze by adding contrast and color. You don’t have to deal with different tools because dehaze is applied to all effects individually.

This image was taken at badshahi masjid right around sunset with my DJI Mavic Drone. Usually, the majority of the pictures taken from drones look a little bit washed out so in that situation we need a dehaze tool.
The image had more contrast, color and clarity. Clouds and volcanoes no longer look washed out because the Dehaze tool adds more texture and dynamism.

Increase the Clarity
Whenever I see that my picture gets flat then I like to add some clarity that is present under the detail option. In this photo of cutton waterfall in Kashmir I wanted to make the texture of the waterfall more prominent so I used the Clarity tool to do this.

So I increase the clarity to make the rocks more prominent but the problem is that the image was still washed out, to fix that issue I enhance the contrast and decrease the blacks to bring some contrasting look and pop out the dark area. Now you can notice in image have good depth and the rock have more texture.

Use Face Tool
The face tool plays an important role in fixing the issue of portrait and selfie shots immediately in polarr. Its work is to detect every face in a photo and apply modifications to fix mini flaws. I.e. I took this photo from my Sony a5100 in the afternoon and the sun gave a very harsh shadow to my face. But no worries, with a polarr’s face tool I was able to lighten the photo and remove some dark areas from my face.

Initially, I selected the Skin Under Face Tool and smoothed and enhanced the skin tone to refine the skin. I then tone down the skin shadows on my face and enhance the skin highlights to get rid of the bad lightning of the day. Once I applied all these things, I got an amazing face. Highly appreciated.

Final Verdict
Polarr is an easy and fun creating application that makes the instagram editing quickly. In this article I have discussed some best editing tips of polarr apps which will make your work easy. Hopefully you will enjoy it after using it just like me. Furthermore, polarr app is available for android or iphone but its apk version is also available for desktop. If you think these tips help you alot then don’t forget to visit Picsart for pc and Meitu app to enhance your editing skills.
Recommended for you

