

Why do we need gifs or emojis? they are used to convey a proper message, where you are short in words. We take help from the built-in gifs provided through social media apps like Facebook, WhatsApp, Insta, Messenger etc. But we want to be creative people and make gifs using our own ideas. Yes, Picsart offers an opportunity to create custom gifs from scratch, and we’re here to learn how we make and edit gifs in picsart using different devices.
How to Make a GIF in Picsart using iPhone/iPad
If you want to create a GIF of your favorite photo, or a friend’s photo, or any other pet photo, follow the procedure below. If you haven’t installed picsart yet, you need to first install it from the App Store where you can find the app with limited features, to get the premium features you need to download animator mod apk will be.
Steps You Need to Follow
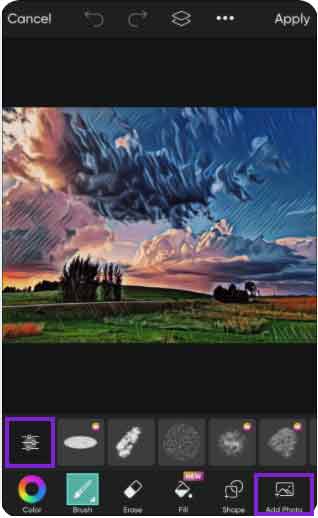
1) Firstly allow the camera to get access to gallery photos, pick the image and open in the picsart
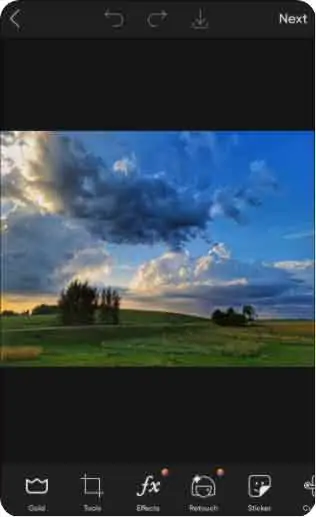
2) Here you will find the editing tool below
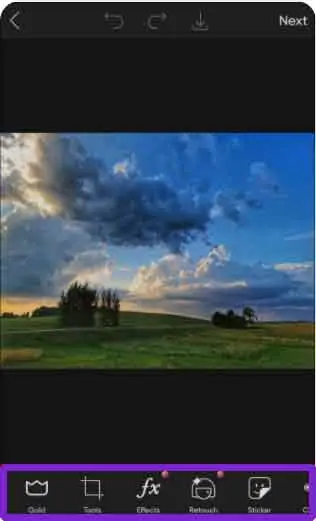
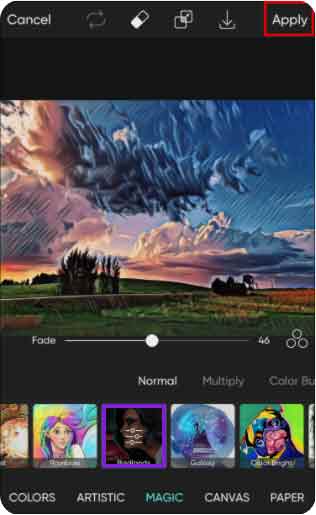
3) Edit the photo as you want and apply the changings

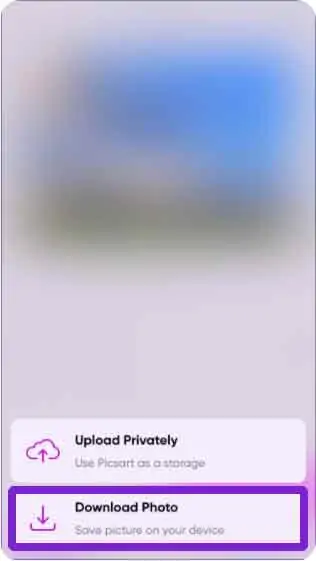
4) Save and download it
5) Go back to the image you edited in Picsart, and you’ll need to edit it again but slightly differently, so repeat the process
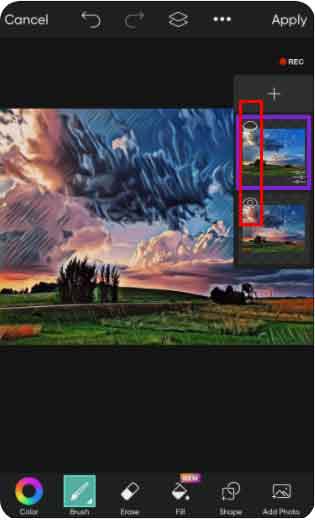
6) In the bottom right corner, tap the icon that looks like three pages on top of each other. This will allow you to overlay previous edits you created. Remember to overlay the images in the order you made them flow
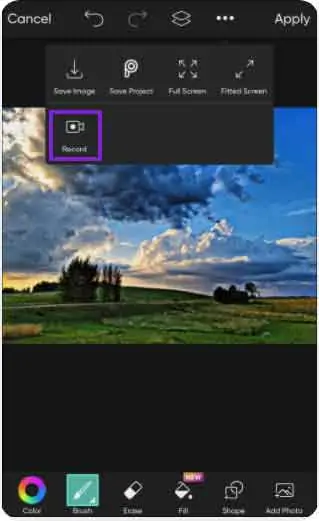
7) Once you’ve layered up your photos, tap on the recording tool at the top right of your screen
8) Start opening and closing all your layers in the sidebar in the order you created them
9) When done, tap the recording icon again and click “Export GIF”
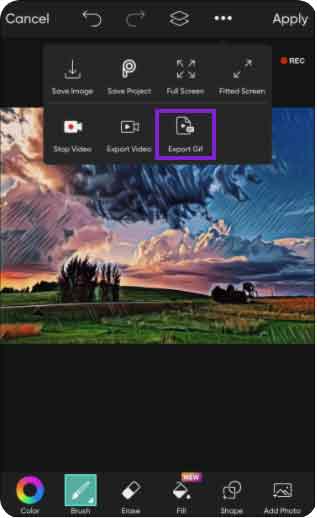
10) All done
How to Make a GIF in Picsart on an Android Device
There is no major difference, you can make gifs on an android device same as IOS, we also cover it for your ease.
- Open the App and choose the picture from gallery
- Do your editing using the tools provided, save all changes with the Apply button, download the photo.
- Repeat this process until you have made the necessary edits to create your GIF.
- Use Layer icon from right bottom corner and start layering
- Then tap on Recording and open and close layers
- Tap Recording again to stop it
- Tap Export Gif
- Set the Speed
How to Make a GIF in Picsart on a PC
For PC users, you need to install picsart for desktop from play store or from our apk file for premium features. Then you need to follow all steps to make Gif on PC.
- Click on “New Project
- Allow it to sync the images
- Choose a photo
- Using tools edit the photo as per your requirements
- Select the same image from the left hand sidebar and then edit it differently. Be sure to save every image you layer.
- Tap the recording tool, then open and close each layer in the right sidebar.
- Once finished, tap “Export Gif”. Adjust your animation speed.
How do I Edit a GIF Image?
Here we will learn how to edit existing GIFs using Picsart, you can further decorate your images, and most of the time it is used to outline the image. Let’s start
- Put your Gif into Picsart
- From toolbar, choose Draw
- Add the first frame of Gif
- Click on Multi coloured square
- Choose color you want to use in outlining
For more deep editing you can use different platforms like ezgif and GIPHY CAM which are most recommended nowadays.
FAQ
How Can I Share GIFs Made in PicsArt App on WhatsApp?
After creating a GIF, now it’s ready to meet the world, sharing on WhatsApp is very easy. Because the share button is included to share it on PicsArt, Facebook, Instagram, Twitter, Messenger and WhatsApp.
PicsArt Apks