
Here, We will explore different types of blending like blending two pictures into perfect image seamless harmony. This type of editing will merge different photos in an absolutely unique masterpiece. If you are thinking of blending photos you must try out this type of crowd blending. In this article, you will learn to blend photo colors, blend skins, stickers, background in picsart.
How to Blend Photo to Make Incredible Layers
To get started, you will need two things, one is idea and the other is two or more pictures you want to work on.
Process to Add Layers
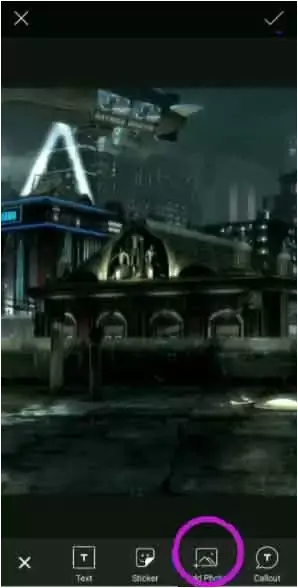
For creative combinations add images by using Add Image Icon and follow below defined steps
Open Image: Tap edit and choose your selected pictures.
Select the Overlay Photos: Tap add photos and select the photos you want to use as overlay.
Enlarged the Photo: You can also Change the size of the photo as you want.
Customization of the Blending: It’s all up to you to set the blending and opacity of photos according to your customization.
Confirmation: Save your piece and share it as you want it’s all up to you.
How to Merge Two Photos in Picsart
Now this question is raised: How to merge pics in picsart. This difficulty is solved by following step by step procedure.
Processing Steps
Here we guide you how to mix photos other than picsart collage.
Select your Photos: Open the picsart and select your photos from the main screen.
Select the Second Photo: Select the Add Photo icon and then select the second picture.
Shuffle the Photos: Shuffle the pics in random order.
Now the question is how to overlay two photos in paint. Firstly open the picture that you want to use as a background picture in paint. Press the Ctrl V to paste the frame. Resize the icon and reduce the required photo size with the overlay select. Drag the message to the background where you want it.
How I can Add Wing to an Photo
You can get wings from photo editing by following the below method
- Select your photo in the draw
- Select the clip art (Find the free to fly package and write the message that you want to write)
- Placed photo
- Remove and Repeat
- Open the Image Editor
- Apply the Effects
How to Blend a Character into a Background on Picsart
Now I’m going to discuss how to blend a character into a background when editing in picsart.
Step-by-Step Processing
Here we explain the procedure in 9 simple steps you can easy adopt.
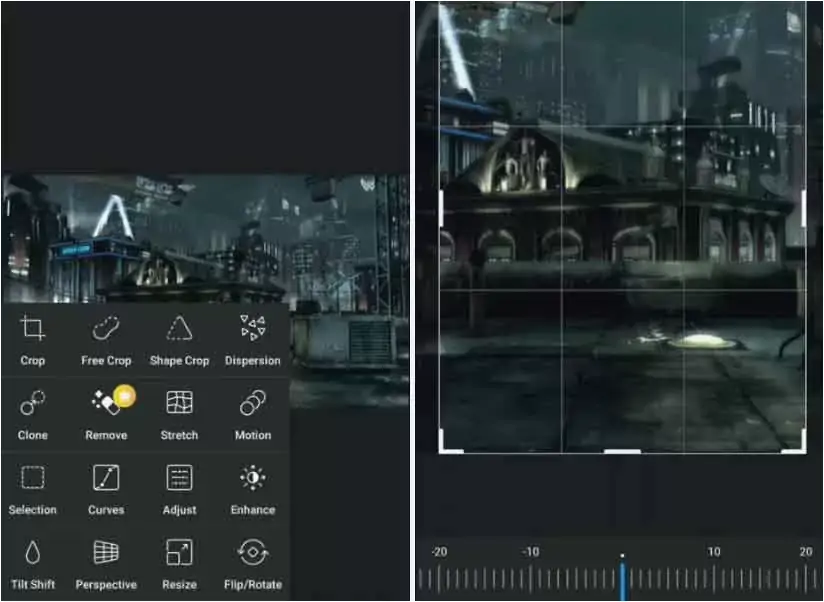
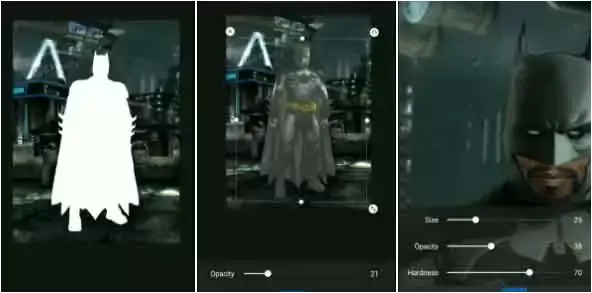
1. Crop Your Photo: Crop the photo of appropriate measurement of your object going to Tool then Crop to crop the image as you want. Click the checkmark when done.
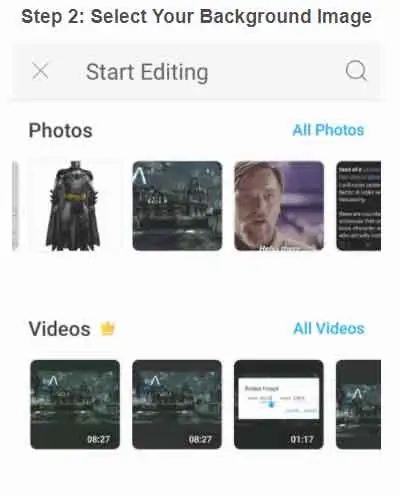
2. Select Your Background Image: Open the app and select the image for the background of your choice.
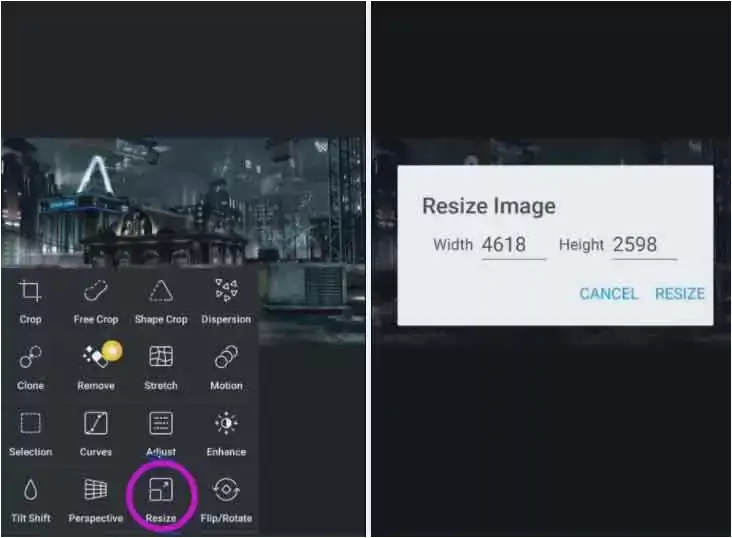
3. Resize The Photo: Firstly open picsart, select your photo and then go to the resize option in the tool tab and input the max credentials. This will increase the quality of your picture 10 times. Click the checkmark when done.
4. Add Your Character: Then go to the Add Photo icon and select the photo of your choice. Then check its position and size according to the photo and adjust it. Do not click the checkmark yet.
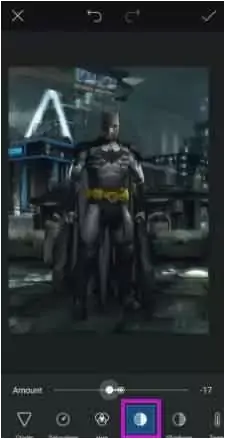
5. Blending By Using Light: Click the layer of your object then click Adjust. Play with the brighten and contrast option until your object is light and fit enough. Click the first check mark when done, do not click the second for object.
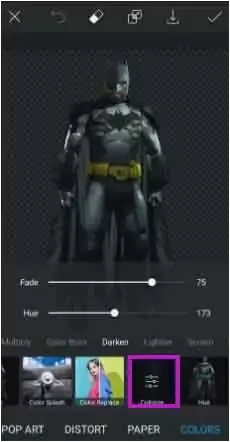
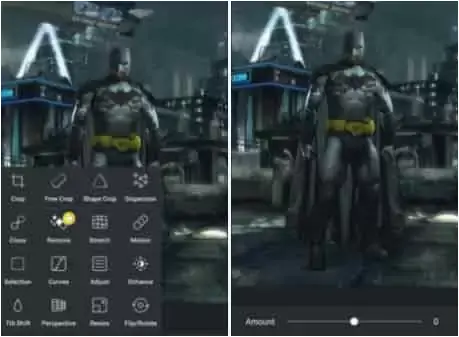
6. Color Correction: To blend your object into surroundings go to FX, color, colorize and drag the filter tab to darken drag HUE bar until the color scene is most on your background there. Then fade enough the object so the scene becomes realistic.
7. White Duplication of Object: Going to the top middle icon that has two squares. Click on the tab that says DUPLICATE. Put it in the previous picture. It is like a layer on the original picture.
Go to FX, color, black and white and slide the bar all the way to the right to make it completely black. Go to the top middle icon until more editing and use more filters. Now You should have white copy of your photo. Click the first mark when done.
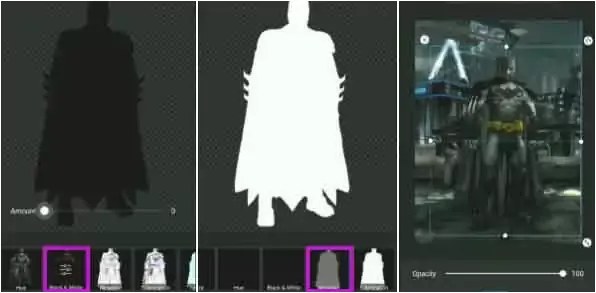
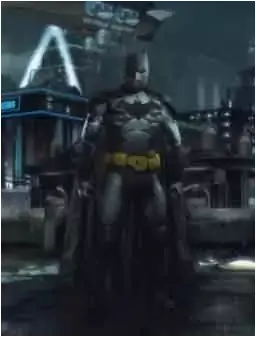
8. Add Brightness in White Duplicate: Click the opacity tab and lower the opacity level of your white duplicate so the bottom layer is barely visible when you finish clicking then click the first checkmark.
9. Brushing: Go to the Tool Adjust and use eraser and brush tool and play around with contrast brightness and highlight until you get a satisfactory result and your picture gives a realistic look.
Tip: Pay attention to the light sources where they hit.
Done: Lightening brushing and using all filters that are necessary to make your object masterpiece is completed then we said editing is done.
PicsArt Apks