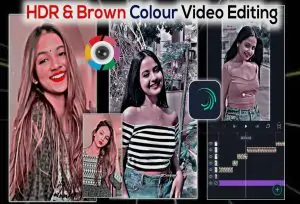
As we know, alight motion is becoming the most popular video editing app today and its popularity is only due to its unique effects and HDR colors. Alight motion HDR effects with brown indicate how effective they are for the videos you capture. Also, these effects and colors are very easy to use but if you suddenly get stuck somewhere and want to get out of there easily, we will provide you with a helpful video.
In this app, alight motion introduces stunning and desirable effects that give your animated videos, vector images, motion graphics and much more a beautiful look. All effects are highly esteemed, but Brown is a great and wonderful effect that was recently launched in the AM app. People love this effect from the bottom of their hearts and because of this its installation has increased more than before.
Alight Motion App HDR & Brown Color Tutorial
With these awesome effects and colors, you can make your simple videos a super hit. They hide a number of flaws in your videos that you accidentally make during video shooting.
If you are making super videos but they are not viral then try these HDR and brown color effects. It will definitely make your videos go viral on Instagram, Facebook, Tik Tok, Snack Videos and whatever you want. The majority of tik tokers are gaining popularity in just a few days, due to these amazing color effect schemes.
For doing this, alight motion app should be downloaded in your smartphone, then you can proceed further.
Create Project with Alight Motion HDR And Brown Colour
Here you will learn how to create new projects in alight motion app.
- Open a new blank video editing screen and click the + icon on the bottom right side of the mobile screen to get access to your gallery.
- Select your desired video which you want to edit and get popular in your friends and social media platforms immediately.
- When you select it, press the (“+”) button in the upper right corner of the device.
- Once you have performed each step correctly, the selected video will be displayed on the Alight Motion Editing template.
- Now you can start further editing to grab the love and attention of the audience.
How to Edit Video Layer Brown Colour By Alight Motion App
Before you get started, you have to figure out which layer you want to put in the video. The Alight motion app has several professional layers that can make your editing superior to others. Other editing apps like kinemaster, CapCut, and FilmGora also have layers but AM Video Editor has a lot of awesome layers of them.
- Choose the video layer first
- Click the effect option and add the effect. There will be multiple effects, just scroll down and choose the channel Remap HSV.
- After that a pop up will appear
- Once you click the standard setting from popup, a channel Remap HSV option will display
- Then change the selected option with A. Your video will convert into a brown color effect simply.
How to use Alight Motion – Brown Colour Effects
The method to use Alight motion brown color is similar to editing a layer of brown color in AM, just hardly 3 to 4 steps are different. Let’s go to the steps without wasting our precious time.
- Visit to the Alight motion app and select the video layer first
- Then add effect from its given library
- In the upper right corner you can display a search icon-> click here
- Write saturation / Vibranbrance and search them from list
- Then pop up will display
- Click standard setting -> Saturation / Vibranbrance
- Now you have full authority to customize saturated and intense from your own way
- enhance the intensity of video quality, just decrease saturation and use the brown color effect.
- That’s it
If you need to know how to move layers in Alight Motion: Visit it
New Shape of Alight Motion App HDR Effects
- Create new project press the plus button and select rectangle or any other shape from the library
- Click on colors and fill the shape.
- Select a color and turn back to blending and opacity
- make contrast (Overlay)
- Now Your video layer has HDR effects turned on.
How to Use Alight Motion HDR Effects for Video Editing
- First, open the app and press on plus (+) icon.
- Then choose a square shape which fits with the video layer screen.
- Press on color and fill it.
- Now select a green color.
- Then brook and press a blinding & opacity.
- Scroll down and press on difference.
- Choose a subtract and press on a back button.
- Then click to effects and add filters.
- On your right corner you will see a search bar.
- Click there and search for a copy background.
- Again click on effects and add your desired filter.
- Search Gaussian Blur on the search bar.
- Go to the standard setting and increase the blur strength 0.200.
- Again add effects and search exposure/ gamma.
- Go to standard settings and click on the three dot menu.
- Exposure – (-1)
- Congratulations you have done.

